Hardware Overview
Reader Configuration
Reader Configuration Table
The reader configuration table lists all devices that are connected to the InfiniTime software. The reader configuration table provides a convenient location for testing device connectivity, updating reader programming, and updating employee data contained in a reader's database. Before a clock can be used to poll timecard activity, the clock must be configured. Detailed configuration and installation instructions are available for each InfiniTime compatible time collection device.
Accessing the Reader Configuration Table
-
Open the Reader Configuration Table
-
Click on Lookups
-
Click on Reader Configuration
The Reader Configuration Table will open. The reader configuration table is organized in a tree structure similar to that used by Windows Explorer. A separate folder, or reader type entry, is displayed for each hardware model according to its connection type. In this way readers of the same model and connection type are grouped together. There are two steps to configuring a reader within the InfiniTime Application. First the Reader Type entry must be defined. By default, clicking insert will open the reader configuration update form, making it possible for the user to specify the type and connection method for their readers. When this information is saved the reader type entry is created. Two examples of reader entry types are shown below.
After a reader entry type has been created a reader address entry must be defined. To insert a reader address entry follow the steps below.
1.) Expand the Reader Type Entry by clicking on the plus sign.
2.) Click on None and Click Insert to open the Reader Configuration Update Form.
Reader Configuration Update Form
Port Name: Enter a name for your clock. This name should be recognizable and descriptive, as it will be displayed in the Reader Configuration Table representing the record for your clock.
Type: Select your Clock Model from the models in the list. NOTE: A scout 1000 requires a different configuration than other Scout Models. Select the Scout 1000 type if you have a Scout 1000.
Port: Select the port that corresponds to your reader. Select TCP/IP if you are using an Ethernet connection to communicate with your clock.
Poll From File: Some readers such as the Luna and Zephyr support the Poll From File Feature. Using the menu at the clock punches can be downloaded to a USB Thumb drive and transferred to a PC. This is especially useful for sites without a network or internet access. Refer to Hardware Documentation Zephyr or Hardware Documentation Luna for additional information on configuring and using poll from file.
Baud Rate: Select the communication baud rate that corresponds to your reader. The same Baud Rate must be set on the reader and the software in order for the device to communicate successfully. Refer to the section of this document that corresponds to your specific timeclock model for more information.
Default Baud Rate
| Older Synel Readers | 9600 |
|---|---|
| New Synel Readers | 19200 |
| Direct Connect Scout* Hand Readers | 9600 |
| Scout* Hand Readers (Modem) | 9600 |
*Refers to All Scout Models (1000 - 4000)
Data Processing Every: Here you can decide how often you want the data to be processed. The automatic setting will process and post employee activity as soon as it is retrieved from the reader. If you want to process the data according to a specific time interval you can select an increment of time in which to process the data. If you select an increment of time the data that is polled will not be processed until the time selected. The data is stored in the polled information and then once the time comes to process the data is then when it will show in the activity of the employee.
Note: Automatic is generally the preferred setting for Data Processing. In this way employee timecard activity is automatically processed when it is polled from the reader.
Last Data Process Date: Displays the date on which data was last processed.
Last Data Process Time: Displays the time at which data was last processed.
Reader Addresses Tab
The Reader Address Update form, as shown when inserting a new reader configuration or changing an existing reader configuration, is connection method and clock specific. The information available for configuration on the Reader Address Update form changes according to the clock type and connection method selected. This setup eliminates unnecessary information within the Reader Address Update form and assists users with configuring options specific to their chosen clock model and connection type. The following tables show which configuration settings are available according to connection and clock type.
| Reader Type | Apollo | Atlas | Odyssey | Omega | Orion | Plus | Scout | Scout 1000 | SY-400 |
|---|---|---|---|---|---|---|---|---|---|
| Connection Method | Direct | Direct | Direct | Direct | Direct | Direct | Direct | Direct | Direct |
| Access Control Settings | X | X | X | X | X | X¦¦ | X | ||
| Bell Schedules | X | X | X | X | X | X¦¦ | X | ||
| Communication Errors | X | X | X | X | X | X | X | X | |
| General - TCP/IP Tab | |||||||||
| Synel Options | X | X | X | X | X | X | |||
| Scout Options | X | X |
¦Scout 2000 is not compatible with access control or bells.
| Reader Type | Apollo | Atlas | Odyssey | Omega | Orion | Scout | Scout 1000 | SY-400 |
|---|---|---|---|---|---|---|---|---|
| Connection Method | Modem | Modem | Modem | Modem | Modem | Modem | Modem | Modem |
| Access Control Settings | X | X | X | X | X | X¦¦ | X | |
| Bell Schedules | X | X | X | X | X | X¦¦ | X | |
| Communication Errors | X | X | X | X | X | X | X | X |
| General - TCP/IP Tab | ||||||||
| Synel Options | X | X | X | X | X | X | ||
| Scout Options | X | X |
¦Scout 2000 is not compatible with access control or bells.
| Reader Type | Apollo | Atlas | Odyssey | Omega | Orion | Scout | Scout 1000 | SY-400 |
|---|---|---|---|---|---|---|---|---|
| Connection Method | TCP/IP | TCP/IP | TCP/IP | TCP/IP | TCP/IP | TCP/IP | TCP/IP | TCP/IP |
| Access Control Settings | X | X | X | X¦¦ | X | |||
| Bell Schedules | X | X | X | X¦¦ | X | |||
| Communication Errors | X | X | X | X | X | X | X | X |
| General - TCP/IP Tab | X | X | X | X | X | X | X | X |
| Synel Options | X | X | X | X | X | X | ||
| Scout Options | X | X |
¦Scout 2000 is not compatible with access control or bells.
Configuring Reader Addresses
- Click Insert to open the Reader Address Configuration Form.
General Reader setup differs depending on the clock model and connection type. For this reason, two explanations of General Reader setup are provided. One for the TCP/IP Communication Method and one for the Direct and Modem Connection Communication Methods.
TCP/IP Communication Method Settings
TCP/IP General Tab
Address: Enter the Reader Address assigned to the clock during setup. Refer to the section of this document that corresponds to your specific timeclock model for setup instructions.
Description: Enter a name for your clock. This name should be recognizable and descriptive in nature. It will be displayed in the Reader Address Configuration Table representing the Reader Address Configuration Record for your clock. It is important to note that each clock will generally have only one Reader Address entry unless they are arranged in a daisy chain configuration with multiple readers on one communications port.
Connection Type: TCP/IP is the only option available in this drop down as TCP/IP was previously specified as the connection type.
Ignore Duplicate Scans Received: InfiniTime can ignore multiple scans for a single employee within a specific time window. Enter the time window, in minutes, for duplicate scans should be ignored.
Department: Many companies purchase multiple readers and locate them throughout their facility for use with a single department. Selecting a specific department from this drop-down menu will cause InfiniTime to associate all punches from this reader to the selected department. All Departments are selected by default. Timecard Activity is automatically associated to an employees default department when All Departments is selected.
Total Hours Type: Specify the Total hours type that will be displayed for viewing on the reader.
- Daily: Sends daily hour totals to the clock for employee viewing purposes.
- Weekly: Send hourly totals for the current week to the clock for employee viewing purposes.
- Pay Period: Sends hour totals for the current pay period to the clock for employee viewing purposes.
NOTE: Selecting Weekly or Pay Period can quickly fill the memory on most timeclock models. It is important to poll employee timecard activity often if either of these settings is selected.: Enter the Reader Address assigned to the clock during setup. Refer to the section of this document that corresponds to your specific timeclock model for setup instructions.
** Synel Badge Readers Only **
The following items will only be displayed if the clock type you have selected is a Synel Badge Reader. (Apollo/Atlas/Odyssey/Omega/Orion/Plus/SY 400)
Reader Type: Select the appropriate badge reader type that corresponds to the type of badge reader installed in your Synel clock. Choices are Barcode, Magstripe, or Proximity depending on reader model.
- Barcode Badges: Barcode badges are recognizable by the large barcode symbol on the front of the card.
- Magstripe Badges: Magstripe badges are recognizable by the magnetic strip on the back of the card, similar to the strip found on the back of a credit card.
- Proximity Badges: Proximity badges have no identifiable external markings. To clock in or out they are simply passed in front of a compatible terminal.
Badge Start Position: Defaults to 1. Choose the appropriate starting position for use with your badges. This setting generally does not need to be altered for Magstripe or Barcode Badges.
Badge End Position: Defaults to 8. Choose the appropriate end position for use with your badges. This setting generally does not need to be altered for Magstripe or Barcode Badges.
Barcode Symbology: Choose the appropriate barcode symbology for use with your badges. All badges sold by Inception Technologies use the default barcode symbology Code 3 of 9. Some customers have distributed badges to their employees using a different barcode symbology. In many cases, depending on badge size and make, this setting allows these badges to be utilized with the InfiniTime system.
TCP/IP Polling Tab
Polling Interval: Choose how often you would like to poll timecard activity from your reader. Minimum polling times are displayed below according to clock model.
| Reader Type | Apollo | Atlas | Odyssey | Omega | Orion | Plus | Scout | Scout 1000 | SY-400 |
|---|---|---|---|---|---|---|---|---|---|
| Minimum Polling Interval | 30 Seconds | 30 Seconds | 30 Seconds | 30 Seconds | 30 Seconds | N/A | 5 Seconds | 5 Seconds | 30 Seconds |
| Reader Type | Athena | Juno | Luna | Thor | Zephyr | | Minimum Polling Interval | 5 Seconds | 5 Seconds | 5 Seconds | 5 Seconds | 5 Seconds |
Last Poll Date: Displays the date on which the clock was last polled.
Last Poll Time: Displays the time at which the clock was last polled.
Data Update Interval: Choose how often you would like to update employee data to the clock. Employee data includes new employees, employee ids, and changes in employee badges as well as hour totals. This process can take as much as ten minutes, during which employees will not be able to punch. Generally this is only required once at the beginning or end of the work day according to user preference. During software setup users may wish to manually update their clocks in order to test employee information rather than waiting for the clock to automatically update.
Last Data Update Date: Displays the date on which the clock was last updated.
Last Data Update Time: Displays the time at which the clock was last updated.
Set Time At Device: Causes the InfiniTime software to update the time on the reader according to the system clock. Selecting no disables this feature.
Time Zone: This setting is used to set the time at the reader. Ensure time zone chosen corresponds to the time zone where the clock is located. This is often used for TCP/IP or modem clocks in a remote location relative to the InfiniTime server.
Polling From Time: This field is used in conjunction with the 'Polling To Time' field in order to specify a time range for polling. The reader will start polling at the Polling from time, and continue to poll according to the specified polling interval until the Polling To Time is reached. Enter the time at which the reader should start polling in this field.
Polling To Time: See Polling From Time for a detailed explanation. Enter the time at which the reader should stop polling in this field.
TCP/IP Tab

TCP/IP Address: Enter the IP address assigned to your reader. This must be a static address. Refer to the section of this document that corresponds to your specific timeclock model for more information on configuring this address within the reader.
Port Number: Enter the network communications port used to communicate with your clock. Generally, this only needs to be altered if you are positive the default port is in use by another application on your network. The same port must be set in the InfiniTimesoftware and on the reader in order for communication to be successful. Refer to the section of this document that corresponds to your specific timeclock model for more information.
TCP/IP Timeout: Specify the amount of seconds to wait before the TCP/IP connection with the reader times out. Ninety seconds is the recommended value.
Direct Connect and Modem Communication Type Settings
Direct Connect and Modem Communication Type Settings - General Tab
Address: Enter the Reader Address assigned to the clock during setup. Refer to the section of this document that corresponds to your specific timeclock model for setup instructions.
Description: Enter a name for your clock. This name should be recognizable and descriptive in nature. It will be displayed in the Reader Address Configuration Table representing the Reader Address Configuration Record for your clock. It is important to note that each clock will generally have only one Reader Address entry unless they are arranged in a daisy chain configuration with multiple readers on one communication port.
Connection Type: When a COM port is selected on the Port Information Screen in the Reader Configuration Update form two options are available in this field. Specify whether the communications port connects directly to the clock (Direct), or if the communications port is connected to a modem, which will be used to connect to a remote clock (Modem). If Modem is selected the modem tab, as outlined below, will become available.
Note: More than one Modem clock can be polled using the same communications port and modem. A complete reader entry is required for each clock. Do not attempt to add additional Reader Address Entries to a single reader entry for each remote clock.
Department: Many companies purchase multiple readers and locate them throughout their facility for use with a single department. Selecting a specific department from this drop-down menu will cause InfiniTime to associate all punches from this reader to the selected department. All Departments are selected by default. Timecard Activity is automatically associated to an employees default department when All Departments is selected.
Total Hours Type: Specify the Total hours type that will be displayed for viewing on the reader.
- Daily: Sends daily hour totals to the clock for employee viewing purposes.
- Weekly: Send hourly totals for the current week to the clock for employee viewing purposes.
- Pay Period: Sends hour totals for the current pay period to the clock for employee viewing purposes.
NOTE: Selecting Weekly or Pay Period can quickly fill the memory on most timeclock models. It is important to poll employee timecard activity often if either of these settings is selected.: Enter the Reader Address assigned to the clock during setup. Refer to the section of this document that corresponds to your specific timeclock model for setup instructions.
** Synel Badge Readers Only **
The following items will only be displayed if the clock type you have selected is a Synel Badge Reader. (Apollo/Atlas/Odyssey/Omega/Orion/Plus/SY 400)
![]()
Reader Type: Select the appropriate badge reader type that corresponds to the type of badge reader installed in your Synel clock. Choices are Barcode, Magstripe, or Proximity depending on reader model.
- Barcode Badges: Barcode badges are recognizable by the large barcode symbol on the front of the card.
- Magstripe Badges: Magstripe badges are recognizable by the magnetic strip on the back of the card, similar to the strip found on the back of a credit card.
- Proximity Badges: Proximity badges have no identifiable external markings. To clock in or out they are simply passed in front of a compatible terminal.
Badge Start Position: Defaults to 1. Choose the appropriate starting position for use with your badges. This setting generally does not need to be altered for Magstripe or Barcode Badges.
Badge End Position: Defaults to 8. Choose the appropriate end position for use with your badges. This setting generally does not need to be altered for Magstripe or Barcode Badges.
Barcode Symbology: Choose the appropriate barcode symbology for use with your badges. All badges sold by Inception Technologies use the default barcode symbology Code 3 of 9. Some customers have distributed badges to their employees using a different barcode symbology. In many cases, depending on badge size and make, this setting allows these badges to be utilized with the InfiniTime system.
Direct Connect and Modem Communication Type Settings - Polling Tab
Polling Interval: Choose how often you would like to poll timecard activity from your reader. Minimum polling times are displayed below according to clock model.
| Reader Type | Apollo | Atlas | Odyssey | Omega | Orion | Plus | Scout | Scout 1000 | SY-400 |
|---|---|---|---|---|---|---|---|---|---|
| Minimum Polling Interval¦¦ | 30 Seconds | 30 Seconds | 30 Seconds | 30 Seconds | 30 Seconds | N/A | 5 Seconds | 5 Seconds | 30 Seconds |
¦Readers using the modem connection method should not be polled more often than 4 hours.
Last Poll Date: Displays the date on which the clock was last polled.
Last Poll Time: Displays the time at which the clock was last polled.
Data Update Interval: Choose how often you would like to update employee data to the clock. Employee data includes new employees, employee ids, and changes in employee badges as well as hour totals. This process can take as much as ten minutes, during which employees will not be able to punch. Generally this is only required once at the beginning or end of the work day according to user preference. During software setup users may wish to manually update their clocks in order to test employee information rather than waiting for the clock to automatically update.
Last Data Update Date: Displays the date on which the clock was last updated.
Last Data Update Time: Displays the time at which the clock was last updated.
Set Time At Device: Causes the InfiniTime software to update the time on the reader according to the system clock. Selecting no disables this feature.
Time Zone: This setting is used to set the time at the reader. Ensure time zone chosen corresponds to the time zone where the clock is located. This is often used for TCP/IP or modem clocks in a remote location relative to the InfiniTime server.
Polling From Time: This field is used in conjunction with the 'Polling To Time' field in order to specify a time range for polling. The reader will start polling at the Polling from time, and continue to poll according to the specified polling interval until the Polling To Time is reached. Enter the time at which the reader should start polling in this field.
Polling To Time: See Polling From Time for a detailed explanation. Enter the time at which the reader should stop polling in this field.
Direct Connect and Modem Communication Type Settings - Modem Tab
![]()
Phone Numbers: Enter the phone number, just as it would be dialed from a regular phone. Include country and area code when appropriate.
Modem Init String: A string of characters used to initialize the modem and begin a call. The default string, &FE0V1, should be sufficient in most cases.
Available Departments
InfiniTime allows you to switch departments at the reader itself, in this screen you can select which departments are allowed.
By default, all of the departments are in the left hand side and all departments are allowed to be used for transfer at the reader. If you want to assign only a few departments then you need to move those departments to the right hand side by using the arrow buttons.
If you have any departments on the right hand side assigned to the reader and you enter new ones on the software by default they will not be assigned to the reader you will have to manually assign them by moving them to the right.
Available Activity Types
InfiniTime allows you to enter other activity at the reader itself, in this screen you can select which activity is allowed to be entered.
By default, if all of the activities are in the left hand side then all activities are allowed to be entered at the reader. If you want to assign only a few activities then you need to move those activities to the right hand side by using the arrow buttons.
If you have any activities on the right hand side assigned to the reader and you enter new ones on the software by default they will not be assigned to the reader you will have to manually assign them by moving them to the right.
Access Control Settings - General Tab
Many InfiniTime compatible timeclocks can be used for access control purposes in order to unlock a door when authorized employees punch. Access control settings are configured in the Reader Address Table for each specific clock and are outlined below. Refer to the section of this document that corresponds to your specific timeclock model for more information about access control wiring and setup.
![]()
Access Denied Message: Type the message to be displayed on the clock should an employee be denied access. Access would be denied under the following conditions:
- The employee is not authorized to access this location as defined by their Access Control Group.
- The employee is attempting to access this location during hours outside of their schedule.
Access Granted Message: Type the message to be displayed on the clock should an employee be granted access. Access will only be granted if both of the following conditions are met:
- The employee is authorized to access this location as defined by their Access Control Group.
- The employee is accessing the location during hours within the access control schedule or according to schedule overrides.
Lock Relay Open Duration: Set the duration an attached lock relay will remain unlocked after access is granted.
Door Switch Relay Open Duration: Set the duration an attached lock relay will remain unlocked if an attached door switch is pressed.
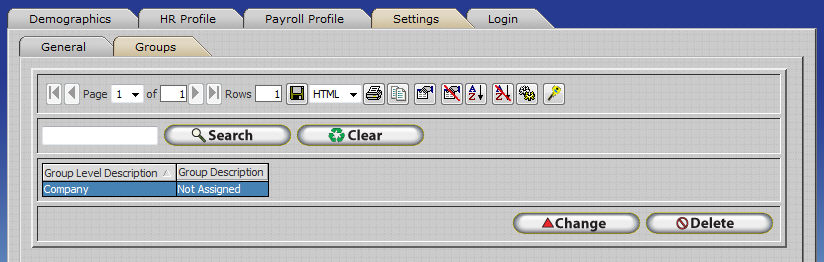
Access Control Groups Tab
The Groups Tab is used to control what employees will be able to utilize the reader to gain access to connected entry ways.
All access control groups that have been configured will be displayed in the left side grid on the Groups Tab. No additional configuration is necessary if all groups are to be assigned to a reader. Groups should be assigned to a reader if only specific groups are authorized to access the door controlled by the reader.
![]()
To Assign Specific Groups to a Reader:
- Select the group you wish to assign to the reader. Use the controls in the center of the screen to assign a specific group to the reader as outlined below.
 Assigns the selected group to the reader. You will notice that the group
will be removed from the left grid and displayed in the right grid.
Assigns the selected group to the reader. You will notice that the group
will be removed from the left grid and displayed in the right grid.
 Assigns all available groups to the reader. You will notice that all
groups will be removed from the left grid and displayed in the right grid.
Assigns all available groups to the reader. You will notice that all
groups will be removed from the left grid and displayed in the right grid.
 Removes the selected group from the reader. You will notice that the
group will be removed from the right grid and displayed in the left grid.
Removes the selected group from the reader. You will notice that the
group will be removed from the right grid and displayed in the left grid.
 Removes all selected groups from the reader. You will notice that all
groups will be removed from the right grid and displayed in the left grid.
Removes all selected groups from the reader. You will notice that all
groups will be removed from the right grid and displayed in the left grid.
Access Control Schedule Tab
The Schedule tab can be used to specify an access control schedule specific to the reader. Schedules configured within the Reader Configuration Update form take precedence over default Access Control Group Schedules. If this schedule is configured employees will only be able to access the entryway connected to the reader during the scheduled times specified in the Reader Configuration Update form. The schedule configured in the Access Control Group Update form will be ignored.
Click Insert to configure the schedule. The employees specified, as explained later in this section, will be able to pass through the access control doorway by using the access control hardware while access is considered Open. When access is closed the specified employees will be locked out.
![]() .gif)
.gif)
Open: Enter a time to consider access to the associated doorway Open.
Close: Enter a time to consider access to the associated doorway Closed.
Valid From: Optional. Specifies the date that the schedule takes effect. Leave this field blank if you wish the schedule to take effect immediately.
Valid To: Optional. Specifies the date that the schedule expires. Leave this field blank if you do not wish the schedule to expire.
Copy: Use this button to copy schedule information entered on one day to another.
 .gif)
.gif)
The example above shows schedule information being copied from Monday to Tuesday, Wednesday, Thursday, and Friday. Clicking OK would copy the information.
Access Control Overrides Tab
The schedule override tab permits additional schedule entries for a specific date. Keep in mind override entries will take precedence over the default schedule for that date. Refer to the section above for instructions on inserting an access control schedule.
Override Example:
An access control schedule is configured to grant access for authorized employees from 8:00 AM to 5:00 PM on 2-5-07. Employees will be working in the evening from 7:00 to 10:00 pm in order to perform emergency repairs. The InfiniTime software administrator must add a schedule override with the schedule shown below in order for employees to be granted access to the warehouse entryway. Remember, the default schedule for the day will be overridden. Be sure to include the times for the default schedule and any necessary changes in the override entry.
![]()
Access Control Always Open Tab
![]()
The Always Open Tab is used to configure time windows for which the connected entryway is always open. During these hours the entryway will be unlocked and authentication will not be required in order to gain entry. Depending on security requirements it may be a good idea to unlock the entryway during peak hours using this feature. Refer to the Schedule tab section of this document for information on configuring access control schedules.
Technical Note: This feature is only supported by Scout Terminals.
Access Control Access Log
The Access Log Tab keeps a record of each attempt to access the attached entryway and whether access was granted or denied. Only employees assigned to the administrator security role can purge the access control log.
Bell Schedules Setup
Bell schedules are used to control a buzzer or system of bells attached to a reader. The bells will ring at each time configured in the schedule for the specified duration.
Configuring Bell Schedules
- Click Insert to open the Bell Schedule Update Form

- Type a description for the bell schedule.

- Specify the duration, in seconds, for the bell to ring when activated.
- Click on the Default Schedule Tab.
- Click Insert to insert the first bell activation time.
- Select the day the bell will ring on. Monday is highlighted by default.
- Enter the appropriate time.

- The copy feature, as explained below, can be used to copy the time to another day.
- Click OK to save the entry.
Note: Only one activation time can be configured per entry. Additional entries must be inserted to add successive bell activation times.
Valid From: Optional. Specifies the date that the bell schedule takes effect. Leave this field blank if you want the bell schedule to take effect immediately.
Valid To: Optional. Specifies the date that the bell schedule expires. Leave this field blank if you do not wish the bell schedule to expire.
Copy: Use this button to copy schedule information entered on one day to another.
![]() .gif)
.gif)
The example above shows schedule information being copied from Monday to Tuesday, Wednesday, Thursday, and Friday. Clicking OK would copy the information.
Communication Errors Table
The Communication errors table keeps a record of any errors encountered when communicating with the clock.

Communication Error Table Related Options
No. of Errors to Store: Enter the maximum amount of errors to store in the Communication Error Table. When the maximum number is reached the oldest errors will be removed from the list as new errors occur. Leave this blank to keep record of all errors that occur. Errors will not be removed from this table unless they are deleted manually if this field is left blank.
No. of Errors Until Comm. Is Stopped: Specify the amount of errors that can occur before the software will stop communicating with the reader. Leaving this blank will ensure communication is not automatically stopped.
Valid Telephone Numbers

In the Valid Telephone Numbers section of the Telephone Punch Update form you can input telephone numbers that the employee can call from to clock in or out using the InfiniTime Telephone Punch. The Telephone punch system will use caller Id to see if the employee is calling from a valid telephone number, if that number is not in the list then the system will not allow the employee to clock in or out.
To insert a valid telephone number click on insert and type in the telephone number the employee can use to call in, you can input several telephone numbers here.

Also you can set a schedule of when an employee can call in to punch, if the employee tries to call outside of schedule the software will not accept the transaction. To set a default schedule for a particular telephone number click on the default schedule tab.
In the Default Schedule Tab you can insert a schedule of when this valid phone number is available to be used. Click on the Quick Schedule Button to create the schedule.
Start Time - In this field you can enter the start time of when this valid phone number is available to be used.
End Time
- In this field you can enter the end time of when this valid phone number is available to be used.
Valid From - Is the date in which the schedule will start to be valid.
Valid To - Is the date in which the schedule will end being valid.
NOTE: The Valid From and Valid To fields are not required, if the fields are blank then the schedule will always be valid.
Copy Button
- The copy button will copy the schedule from a particular weekday to other weekdays.
Telephone Punch Settings
The Telephone Punch Settings allow you to set the telephone punch options:
- Do not Allow Department Switching: This option will allow you to disable the employee's ability to switch departments, which means that the transaction will post the employee's default department or the department specified for the Telephone Punch.
- Do Not Allow Other Activity Entry: This option will allow you to disable the employee's ability to enter other activity such as Sick Time, Vacation Time, Tips, etc. at the time of the call.
- Lockout Invalid Caller Id: This option will allow you to limit which calls will be accepted as valid, if an employee calls from an unauthorized phone number the software will tell the employee that they are calling from an invalid number and the transaction will not be accepted. you will need to set valid telephone numbers from where an employee can call in, either at the employee level, department level or here in the reader configuration.
- User Id Only: This option will allow you to set the Telephone Punch to only ask for an Id to punch in or out, and not ask for a password.
- Menu Goes to Login After Punch: This option allows you to set the Telephone Punch to go back to the login prompt after an employee clock in or out. This is useful if you have multiple employees calling from the same location that way they do not have to dial the number again after each transaction.